 Deutsch
 English
- You are here:
- Junsi
With the new iCharger X12, the renowned manufacturer Junsi has brought a charger in pocket format on the market which is so far unique in its class. Up to 12s can be charged directly!
Despite the small dimensions of 112x64x37 mm, no compromises were made in performance and ease of use.
The technical data is impressive, 1100W charging power (from 23.5V), 1-12s LiPo cells and up to 30Amp charging current are sufficient even for large batteries with high capacity. Of course, all other battery types such as LiHV, LiIo, NiZn, PB, NiCd or NiMh batteries can be charged.
The discharge power is 50Watt, but can be increased up to 1100W by means of an external load (discharge resistor). Of course, the iCharger X12 is also capable of regenerative charging. Here, the battery capacity is fed back into the supply battery from a full flight battery, for example.
The balancer current of 2 amps always ensures perfectly balanced cell voltages.
A USB port and Micro SD slot can be used for logging data, but also for future updates.
The menu navigation is almost identical to the well-known Junsi iCharger 308DUO, 406 DUO or 4010DUO.
A 2.4 IPS LCD display ensures good readability even in low light.
Technical data:
Input voltage: 11-53VDC
Max. Power: 1100W
Length (mm): 112
Max. number of LiPo cells: 12
Balancer equalization current per output: 2A
Max. Charge current: 30A
Discharge current Adjustable for regeneration: 30A
Max. Number of NiCd/NiMH batteries: 32
Input current limit: 35A
Max. Voltage lead acid batteries: 40V
Max. Discharge power: 50W
Micro SD card slot: Yes
Power supply integrated: No
Plug type input: XT60
Plug type charging output: XT60
ATTENTION! To be able to charge 12s a 13 pin XH connector is required on the battery! There is NO balancer board included to be able to charge e.g. 2x6s as 12! (CB-12XH/EH)
For 10s as 2x 5s the well known CB-1010 with the 11-11 wire can be used!
* Charging a 12S battery with 2 balancer connectors *
You will need a PCB with a connection cable matching the battery and the charger. Then the following sequence must be observed:
- First connect the charger to the power supply or a supply battery. If you use a power supply, switch it on first.
Pay attention! Only when the batteries are properly connected to the balancer board then connect to the charger!
- First plug the first balancer connector of cells 1 - 6 "batteries minus side, black cable" into the matching 6S slot of the board from the minus side,
- then plug the second balancer connector of cells 6-12 into the second 6S slot from the positive side "Batteries positive side, red cable". Now connect it to the charger. If it hasn't flashed and smoked by this point, you've done everything right!
- Only now connect the thick red main battery "+" charging cable to the charger, da- after that connect the thick black main "-" charging cable.
Connections: Avoid short circuits, otherwise there is a risk of injury! This described sequence is also valid for charging several batteries in series!
You are responsible for damages and defects that may occur in case of non-observance!
Customers also bought:
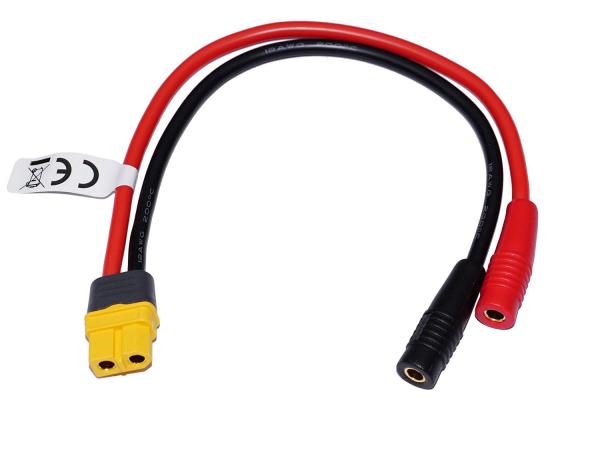
Connection cable 4mm Banana female to XT60 female
Connection cable 4mm Banana female to XT60 femaleauf XT60 Stecker
Art. ZB-BB4-XT60
In stock, available
Within DE: 2 Business Days **
Outside DE: 5 Business Days**
4,90 €*
Connector

AS150 7mm Connector system with anti spark 5x Set
Set for 5x Heli and 5x Battery
Art. AS150S5
In stock, available
Within DE: 2 Business Days **
Outside DE: 5 Business Days**
38,90 €*
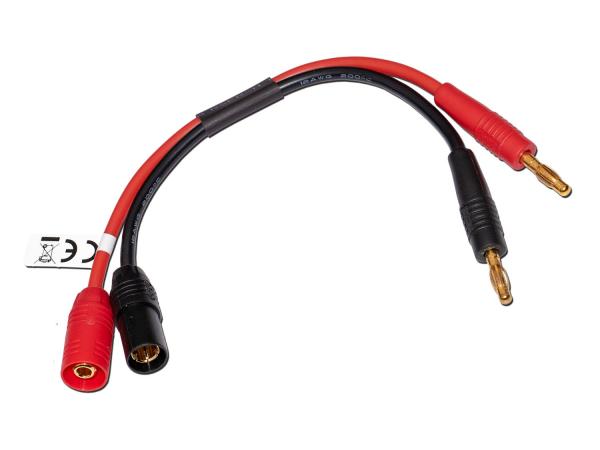
Charge Cable with 4mm Banana to 7mm AS150
Charge Cable with 4mm Banana to 7mm AS150
Art. ZB-LK-AS150
In stock, available
Within DE: 2 Business Days **
Outside DE: 5 Business Days**
7,90 €*
Battery
.png)
ManiaX LiPo 6S 1800mAh 22.2V Orange 80C
ManiaX Power Orange series with 80C
Art. MX22180080OR
In stock, available
Within DE: 2 Business Days **
Outside DE: 5 Business Days**
62,90 €*